Today is the first day of the Retro Challenge – a one month semi-formal excuse to do something cool with retro computer technology throughout April.
I only found out about this a couple of weeks ago. I’ve just spent March planning and prototyping a retro computing project, but I haven’t started the main build yet. I’d also been vaguely thinking about publishing my progress somewhere so others could appreciate what I’m doing. So this seemed the perfect excuse!
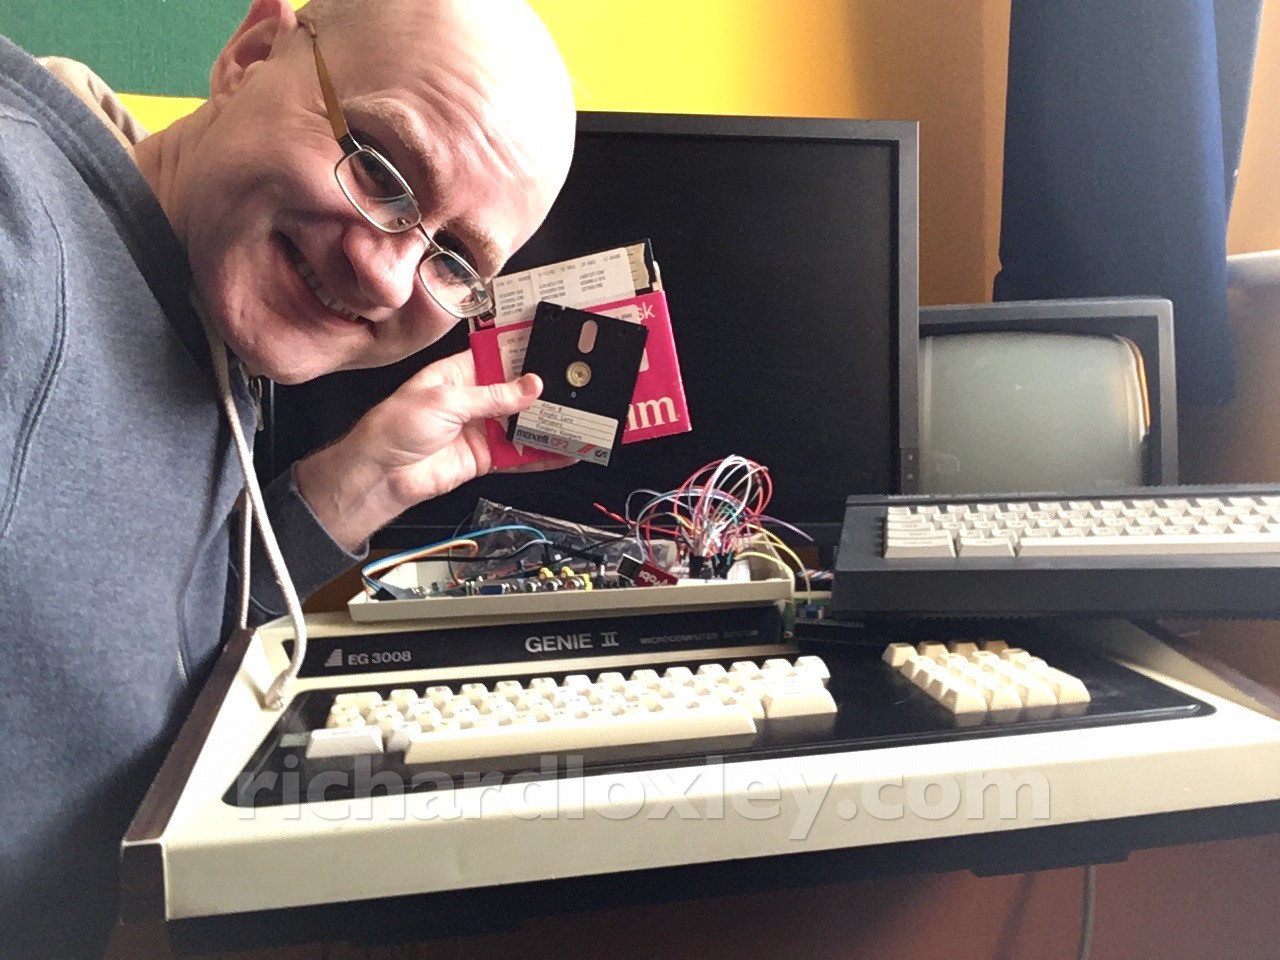
Here’s me surrounded by the technology I’ll be playing with:
And this is the project description I submitted for the Retro Challenge:
“RetroMatic 2000”
I collect 1980s computers. But they are gathering dust in my loft, and I’d prefer they were being used.
My project is to build something that will make 1980s computers easier to use in the modern world:
(1) connect to an LCD monitor so you don’t need an old telly;
(2) store files on a USB stick so you don’t need mechanical disks, and can transfer files easily.There are some products that already do some aspects of these, but no-one does an all-in-one box that can connect to an old computer and “it just works”.
I’m making an all-in-one solution (working title “RetroMatic 2000”), in a retro case that befits my old computers :-)
I’ll be testing it on my EACA Video Genie EG3008, and my Amstrad CPC 464 and 6128. But it should work with most computers of that era, and I hope to eventually use it with my BBC Micro and TI99/4a.
I’ve only just found out about the Retro Challenge but I’ve actually been planning this for a while! I spent March creating the design, and testing some technology that I’ll use.
So for the challenge I’ll start by blogging about my design process, and then carry on with the actual build, blogging as I go.
To elaborate a bit more…
It all started when I reminisced about the old BASIC and Z80 software I wrote on the Video Genie and Amstrad CPC 464 in my teen years. The Video Genie software is long lost, but the Amstrad code I wrote is still on a collection of 3″ disks.
So I set about looking for ways to extract them to a modern computer.
I settled on a floppy drive emulator that could use the Amstrad to copy files from floppy to SD card. It would also allow me to use the Amstrad hardware more easily.
First off, I checked the Amstrad still worked and could read disks. It turned out I needed to repair the disk drive first. Having done that I could go and buy a floppy emulator.
Whilst I had the Amstrad out, I wanted to play some games in colour, rather than using the green-screen monitor. But my modern LCD TV had problems coping with the Amstrad RGB video signal.
That led me into a rabbit hole reading up the minute details of how 8-bit computers faked a 288-line progressive video signal (generally known as 288p) inserted into a 576 line interlaced (576i) PAL TV signal. Old analogue sets could cope with the slightly weird timing that resulted, but modern digital sets that have to digitise the signal can struggle.
Some people have had some success using RGB->VGA converter boards, but these try to deinterlace the signal, giving deinterlacing motion artefacts. Other people had succeeded in using Raspberry Pi’s or Arduinos to reprogram the chip on the converter boards to eliminate some of these issues. It looked like a goer, although a bit of a challenge.
So I decided to make a retro computer ‘converter box’, that would plug into a 1980s computer, and give a VGA signal output that would be accepted by a modern LCD monitor, and would also emulate a floppy drive.
A lot of this has been done before, but I’m bringing together a number of projects, and adding some interesting enhancements.
Here’s a summary of what I’m building on, and what’s new:
Video conversion
- PROVEN: use a GBS8200/HD9800 board to convert RGB to VGA.
- PROVEN: use a single-board computer to reprogram TV5725 chip on the conversion board to turn off deinterlacing and set output resolution and frequency.
- PROVEN: create a sync-stripper circuit to convert RGB/composite to RGB/sync.
- PROVEN: create a scanline generator to recreate 288p resolution on the VGA output.
- NEW: use an Arduino Nano to control the TV5725.
- NEW: add an LCD display and rotary encoder to control the video modes via menus.
- NEW: control the scanline generator parameters from the Arduino.
- NEW: investigate new control parameters for the TV5725 to see if I can get 288p video “windowed” inside an 800×600 (or higher) VGA mode so a standard VGA mode can be used, but without scaling artefacts on the 288p signal, and so the scanline generator on the VGA output is correctly aligned with the input lines.
- NEW: use the Y input of YPbPr to take monochrome video and convert to VGA, ideally with appropriate clipping to black/white to enhance the very poor video signal from such early machines.
Floppy drive emulation
- PROVEN: use HxC floppy drive emulator (SD card dedicated hardware or firmware running on Gotek USB stick hardware).
- NEW: add switchgear to select A or B drive on the fly.
- NEW: insert extra signals from the floppy cable to allow use as C or D drive (e.g. for Video Genie alongside twin floppy drives).
- NEW: add switchgear for Amstrad CPC 6128 external drive acting as A drive.
- NEW: selectively insert 5v power lines onto the floppy cable to support Amstrad CPC 464 DDI-1 interface which hijacked some ground pins to power the disk interface from the floppy drive!
- NEW (experimental): control the HxC from an Arduino, allowing a rotary encoder to be used to operate the HxC menus.
- NEW (experimental): feed drive select, motor select, and data pins from the floppy cable to the Arduino, and generate appropriate sound effects.