This is part of a series of posts for the Retro Challenge 2018/04. See my index page for the other posts.
TLDR? Scroll to the bottom for the video showing how it’s done :-)
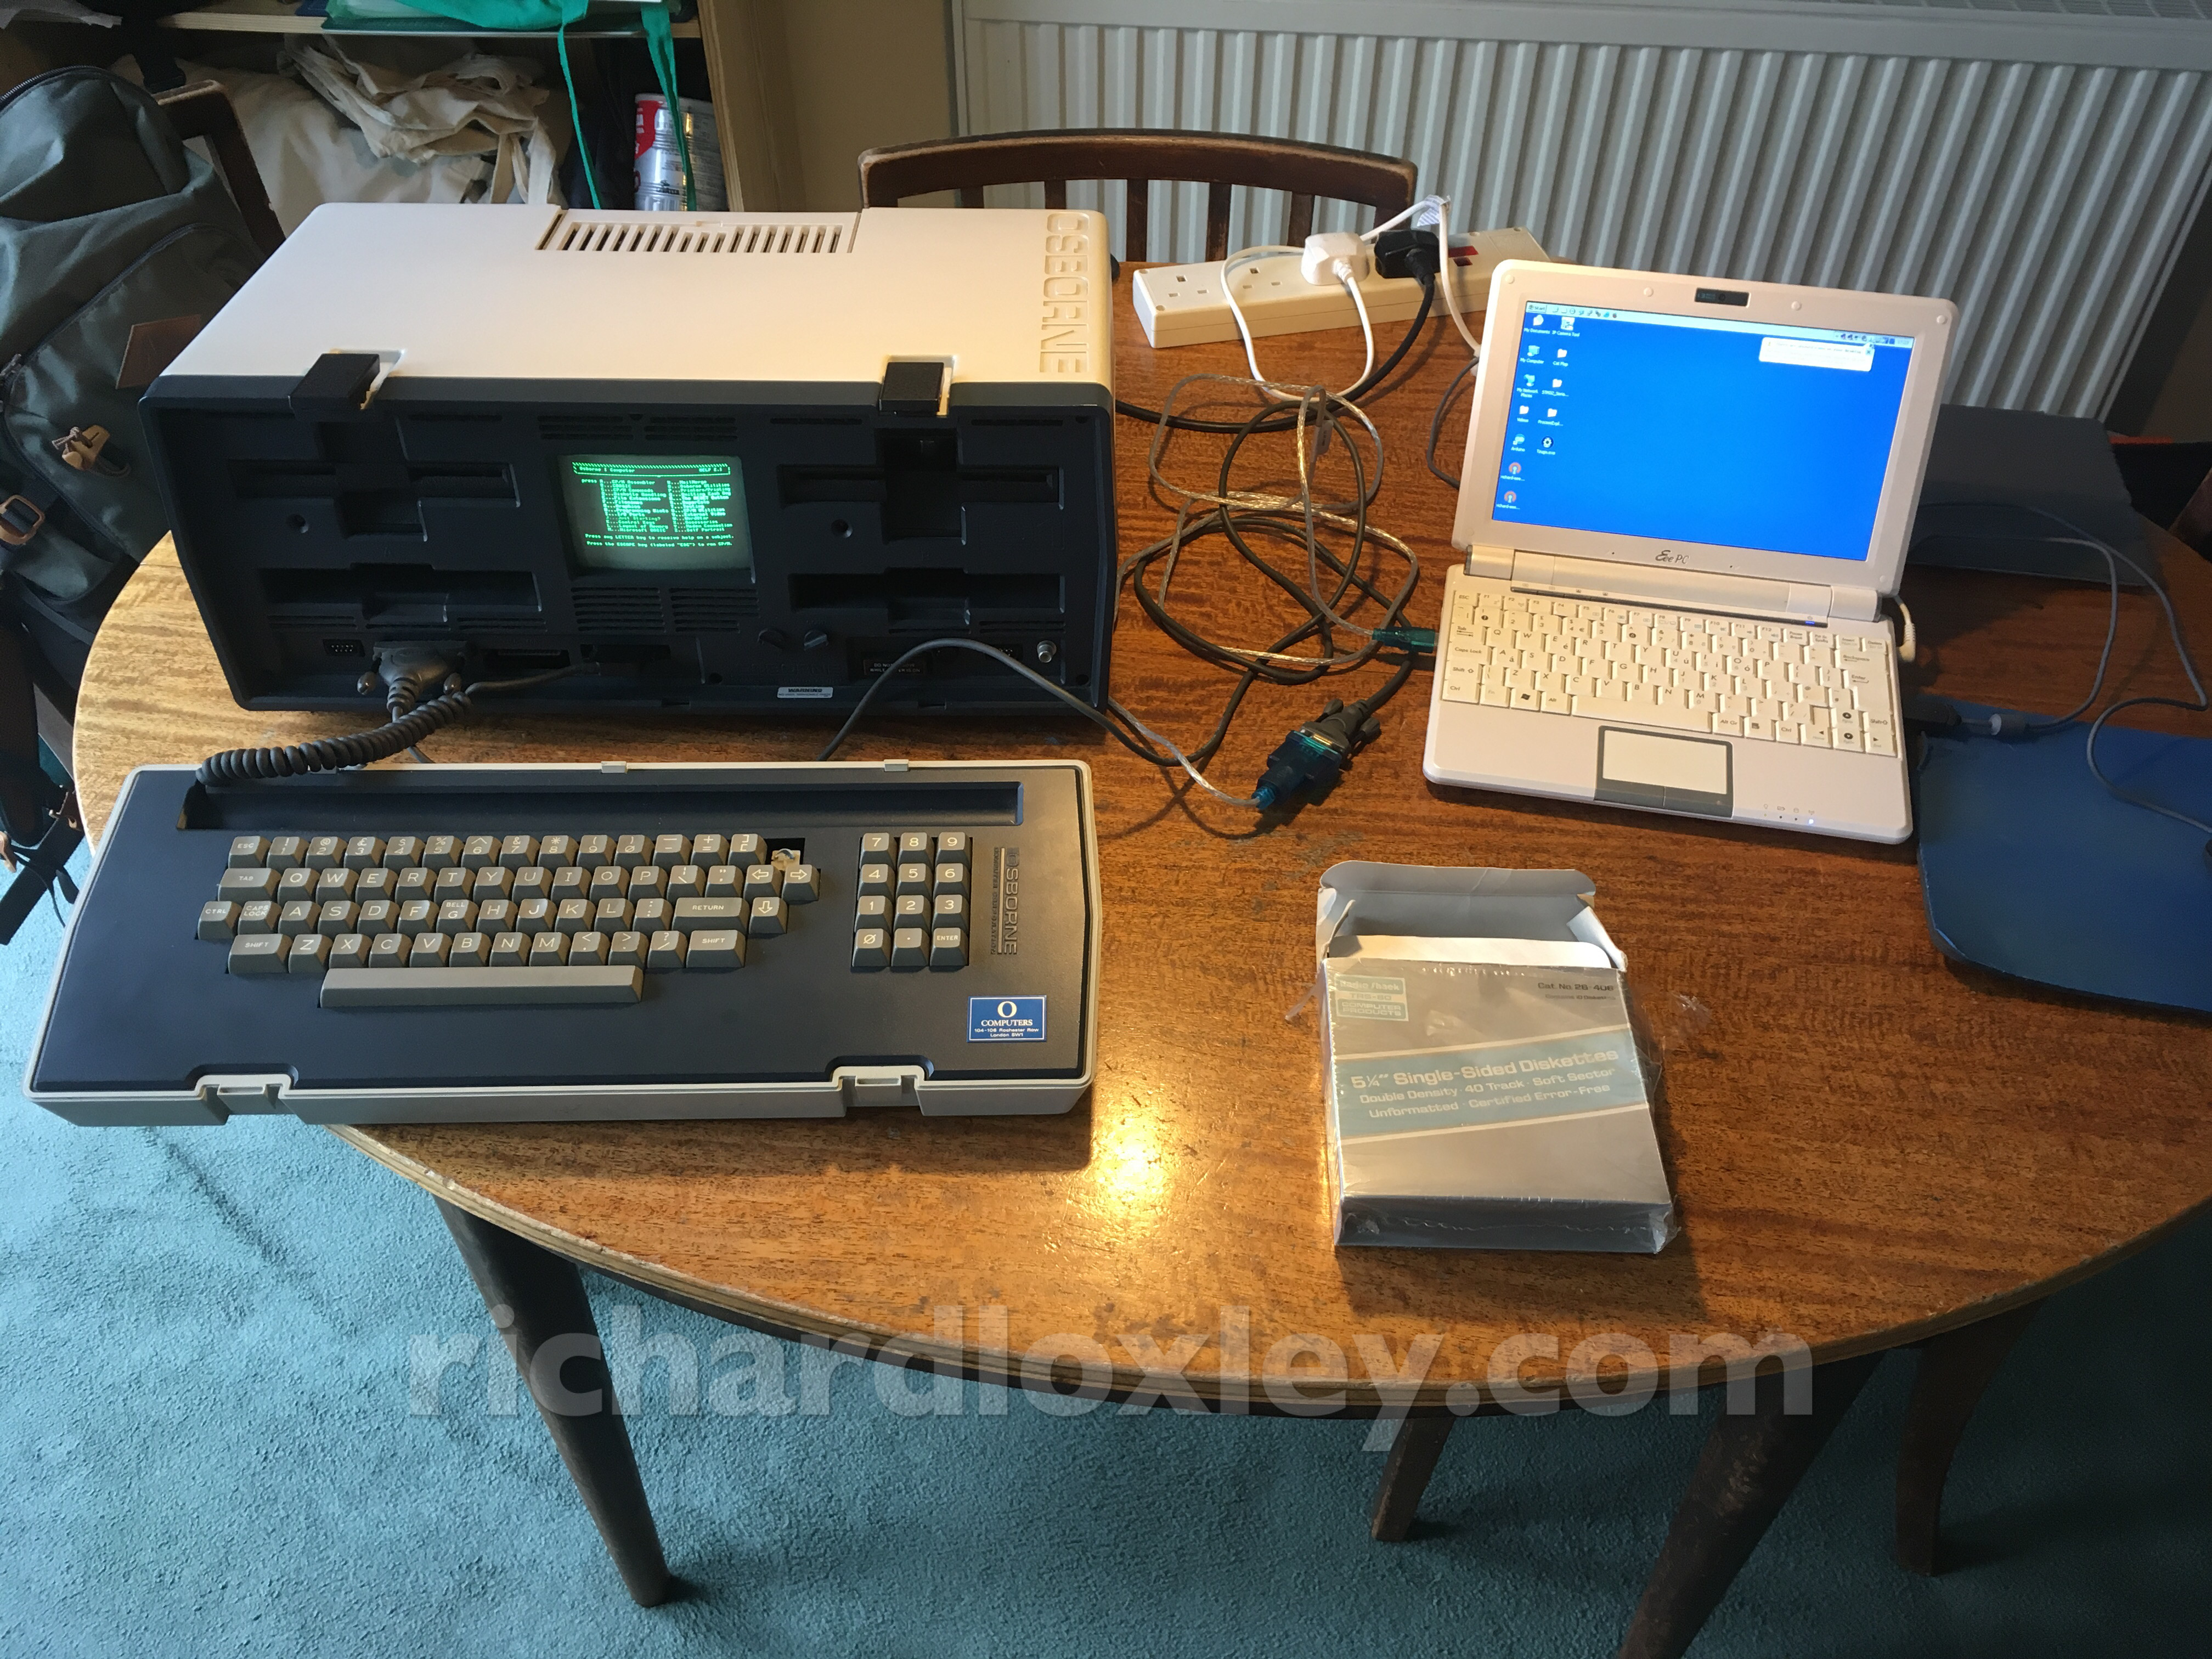
Having got one of my Osbornes working correctly, the next challenge is to get software installed on it. I now have the originally-supplied set of disks containing business software, but as it is a CPM machine, there are countless other programs available (and archived online).
So let’s see what my options are for copying the software to my Osborne…
I found a number of archive sites for Osborne and CPM software. Here are a few of them:
- http://www.retroarchive.org/cpm/
- http://www.retroarchive.org/maslin/disks/osborne/
- http://bitsavers.org/bits/Users_Groups/FOG/Osborne/osborne_src/
- http://www.znode51.de/indexe.htm
Some of the downloads are disk images. Some are actual files (e.g. BASIC .bas files or CPM binary .com files).
The possible ways I have for transferring files are using a USB floppy emulator connected directly to the internal floppy port, or by using an RS232 interface lead on the outside.
The pros and cons of the USB floppy emulator are:
- + I’ve already proved it works (see my previous blog post)
- + It can transfer whole disk images in one go
- + It’s very fast
- – It can’t do individual files
- – I have to open up the computer to access the floppy port and unplug the internal drives (putting stress on a connector not designed for repeated use)
- +/- I could wire up a floppy cable to reach the outside (and a switch to deactivate the corresponding internal drive when required) but it’s unclear how to mount such a modification without changing the aesthetics of such an iconic computer
The pros and cons of the RS232 interface are:
- + It can be done from the outside on an unmodified Osborne
- + It can transfer individual files
- – It’s slow
- – It can’t do whole disk images
- – The literature on how to do it is somewhat lacking
I found a possible solution to the difference between whole disk images and individual files. The cpmtools package (GitHub link) can read and write individual files within a CPM disk image, provided it is configured with the disk geometry used by a particular computer. (The version on GitHub seems to have both SSSD and SSDD settings for the Osborne so it should work.) I haven’t yet tried it, but I plan to. I found a guide to setting it up which might come in useful later.
So probably the best solution for me is to open up the machine once more, do a bulk transfer of all the disk images I’m interested in to real floppies, and then I’m set with most of what I’ll need. I can then use RS232 transfer for occasional additions in the future.
So let’s try the RS232 route and prove that it can work…
I found two discussions/guides to RS232 on the Osborne here: vcfed and toniwestbrook. They imply I need a straight-through (modem) RS232 lead, not a null-modem.
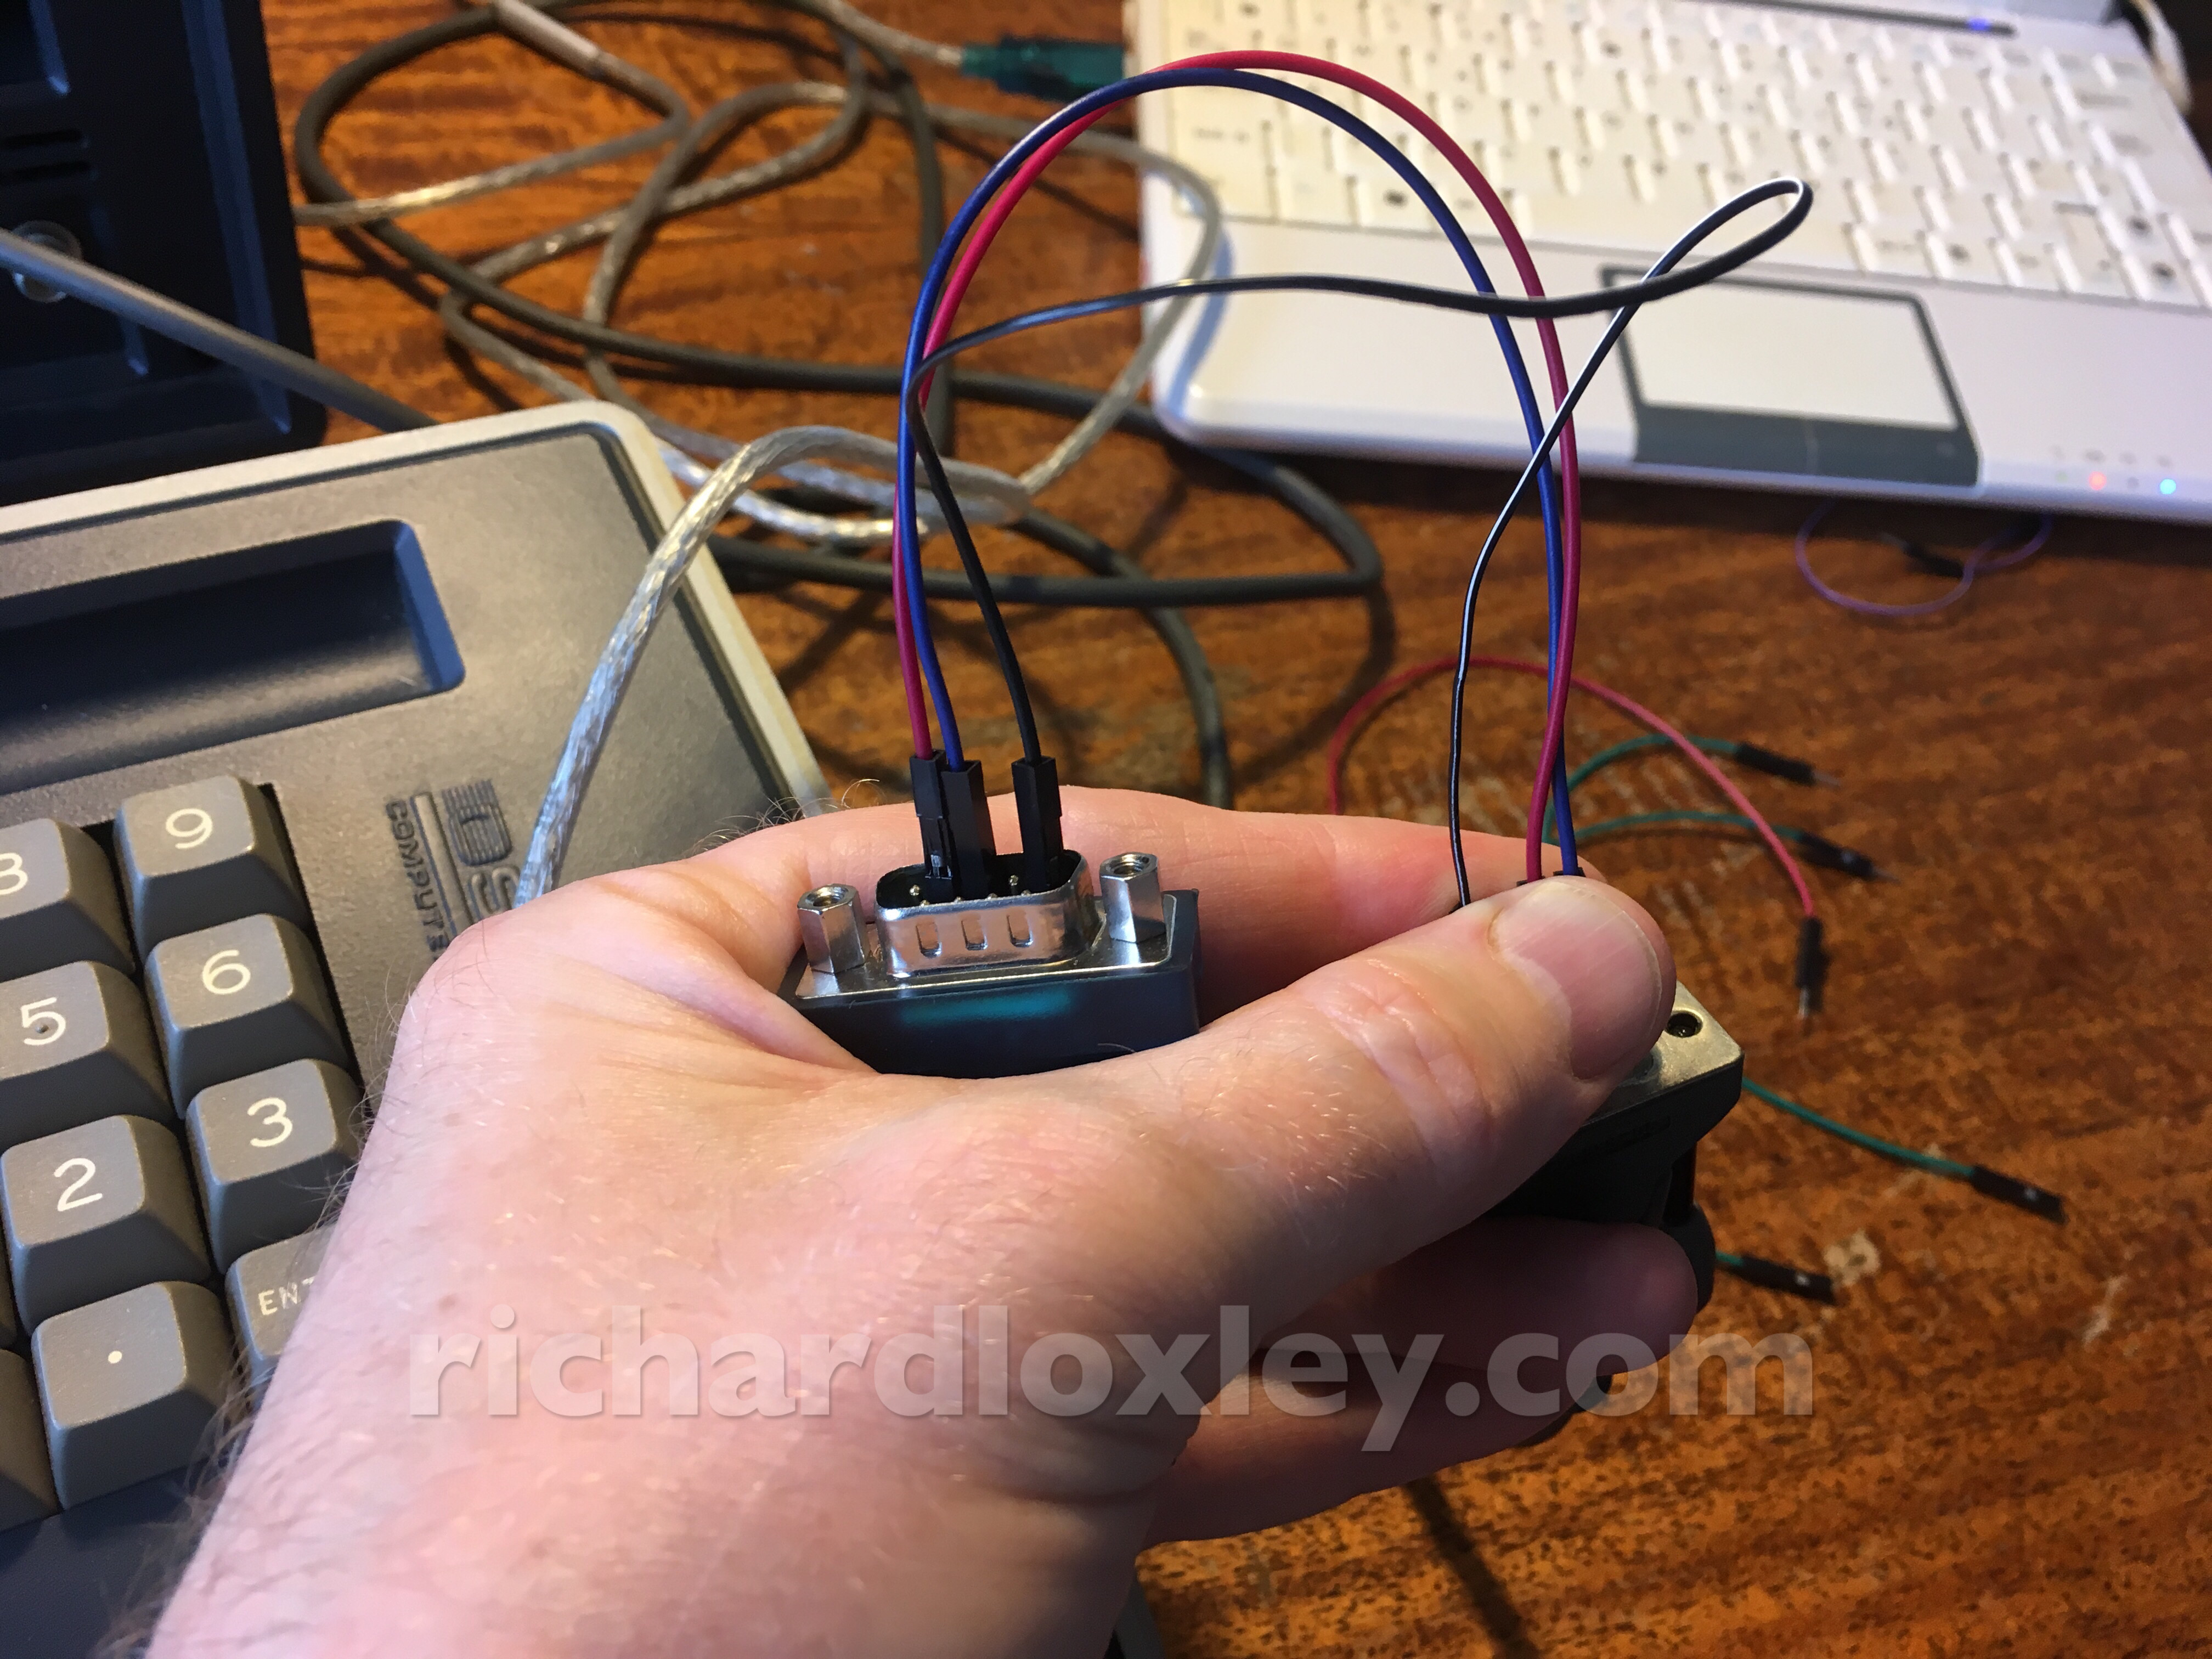
So what interfaces does the Osborne have? It has a male DB9 marked ‘Modem’ and a female DB25 marked ‘Serial RS232’:
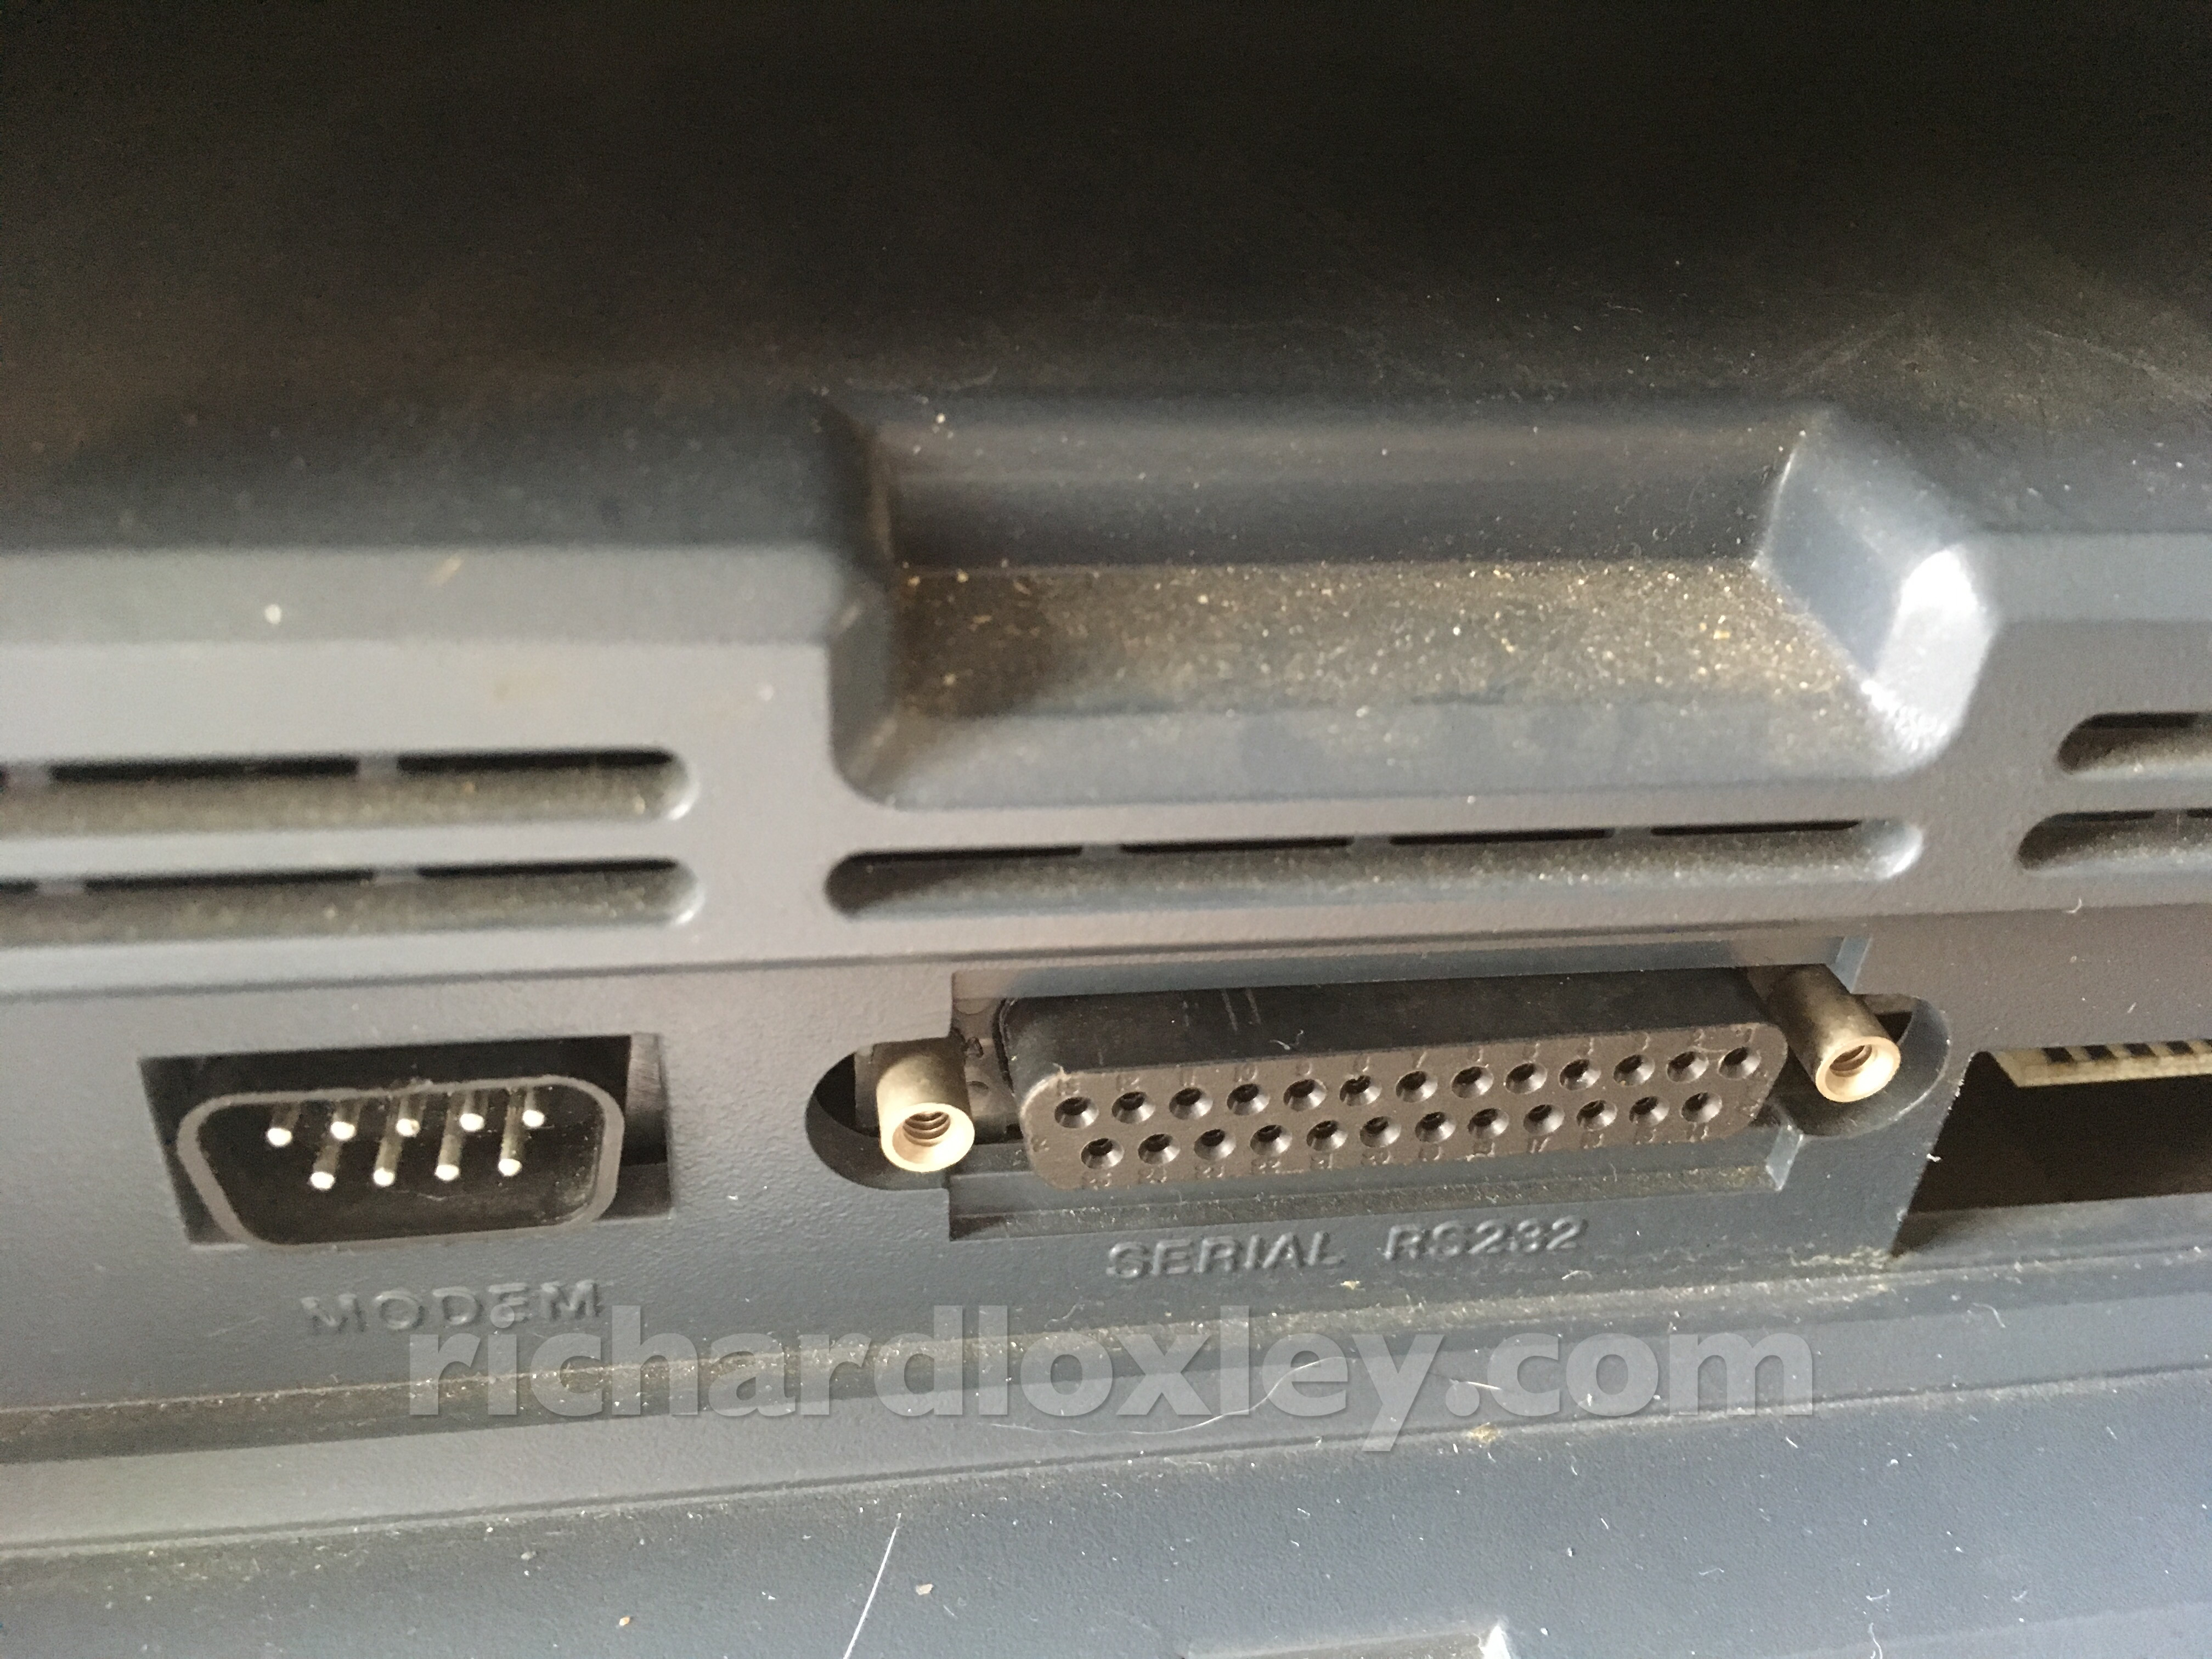
Apparently the modem port is a TTL serial port for a dedicated Osborne modem. No good for us now (but maybe I’ll revisit it later as TTL might offer a chance to make a wireless internet link using an ESP8266?)
The female DB25 RS232 is what we need, so let’s see what we’ve got in the way of old serial cables.
I have a USB to DB9-male serial interface, and two DB9-female to DB25-male leads, Also a DB25-female to DB9-male adapter:

And loads of DB25-male to DB25-male and DB25-female to DB25-male leads:

It’s not clear which are straight through and which are null-modem. It looks like the USB to DB9-male interface and one of the DB9-female to DB25-male leads should do what I want, if it’s a straight-through cable.
I tested the DB9-female to DB25-male leads with a multimeter, and pins 2 and 3 are reversed, which I thought meant it might be a null-modem. But wiring diagrams on Google suggested that was correct for a DB9 to DB25 straight through lead (are the pin connections different for DB9 and DB25?)
One of the cables had a model number on it (Belkin F2L088-06) and Google tells me that’s a modem cable, so it’s probably good for what we need.
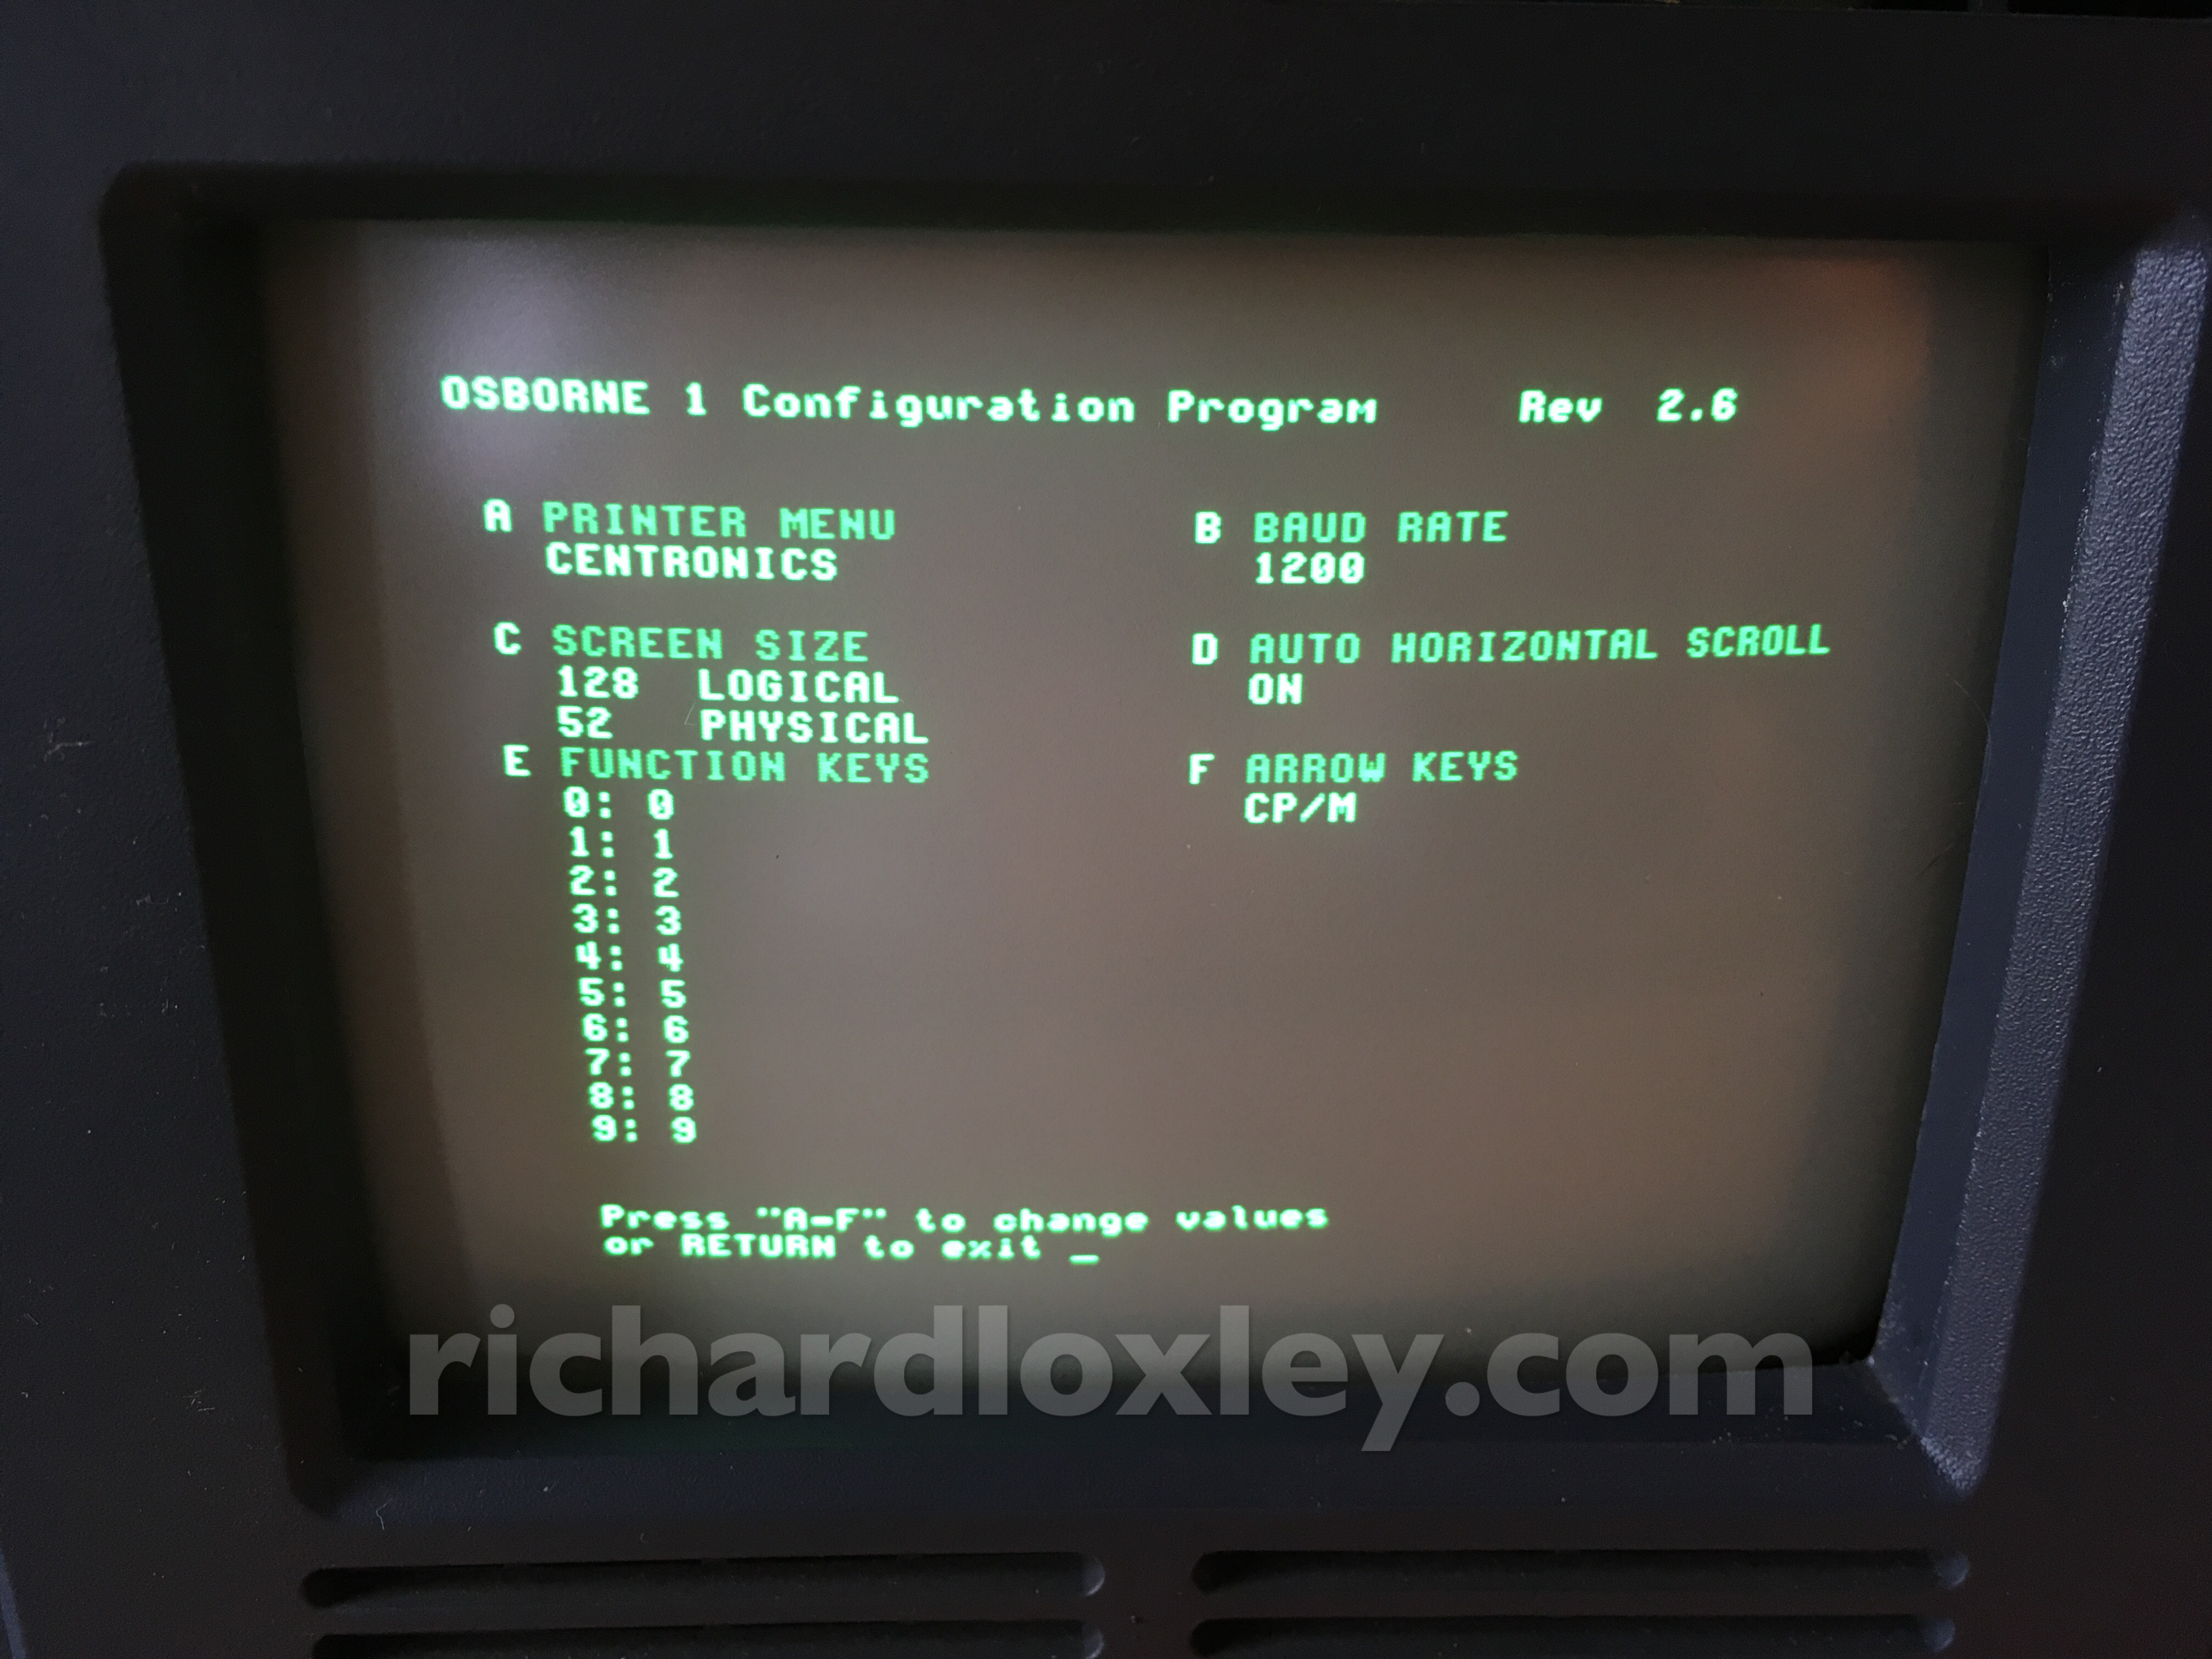
You can set the speed of the serial port on the Osborne to either 300 baud or 1200 baud using the SETUP command (or the SETUP80 command if you have the Screen-Pac installed and followed the instructions on the Extended Utilities disk to rename the updated SETUP to SETUP80).
Now the guides I saw said to use the PIP command to access the RDR: (reader) device. But I couldn’t get that to work at all:
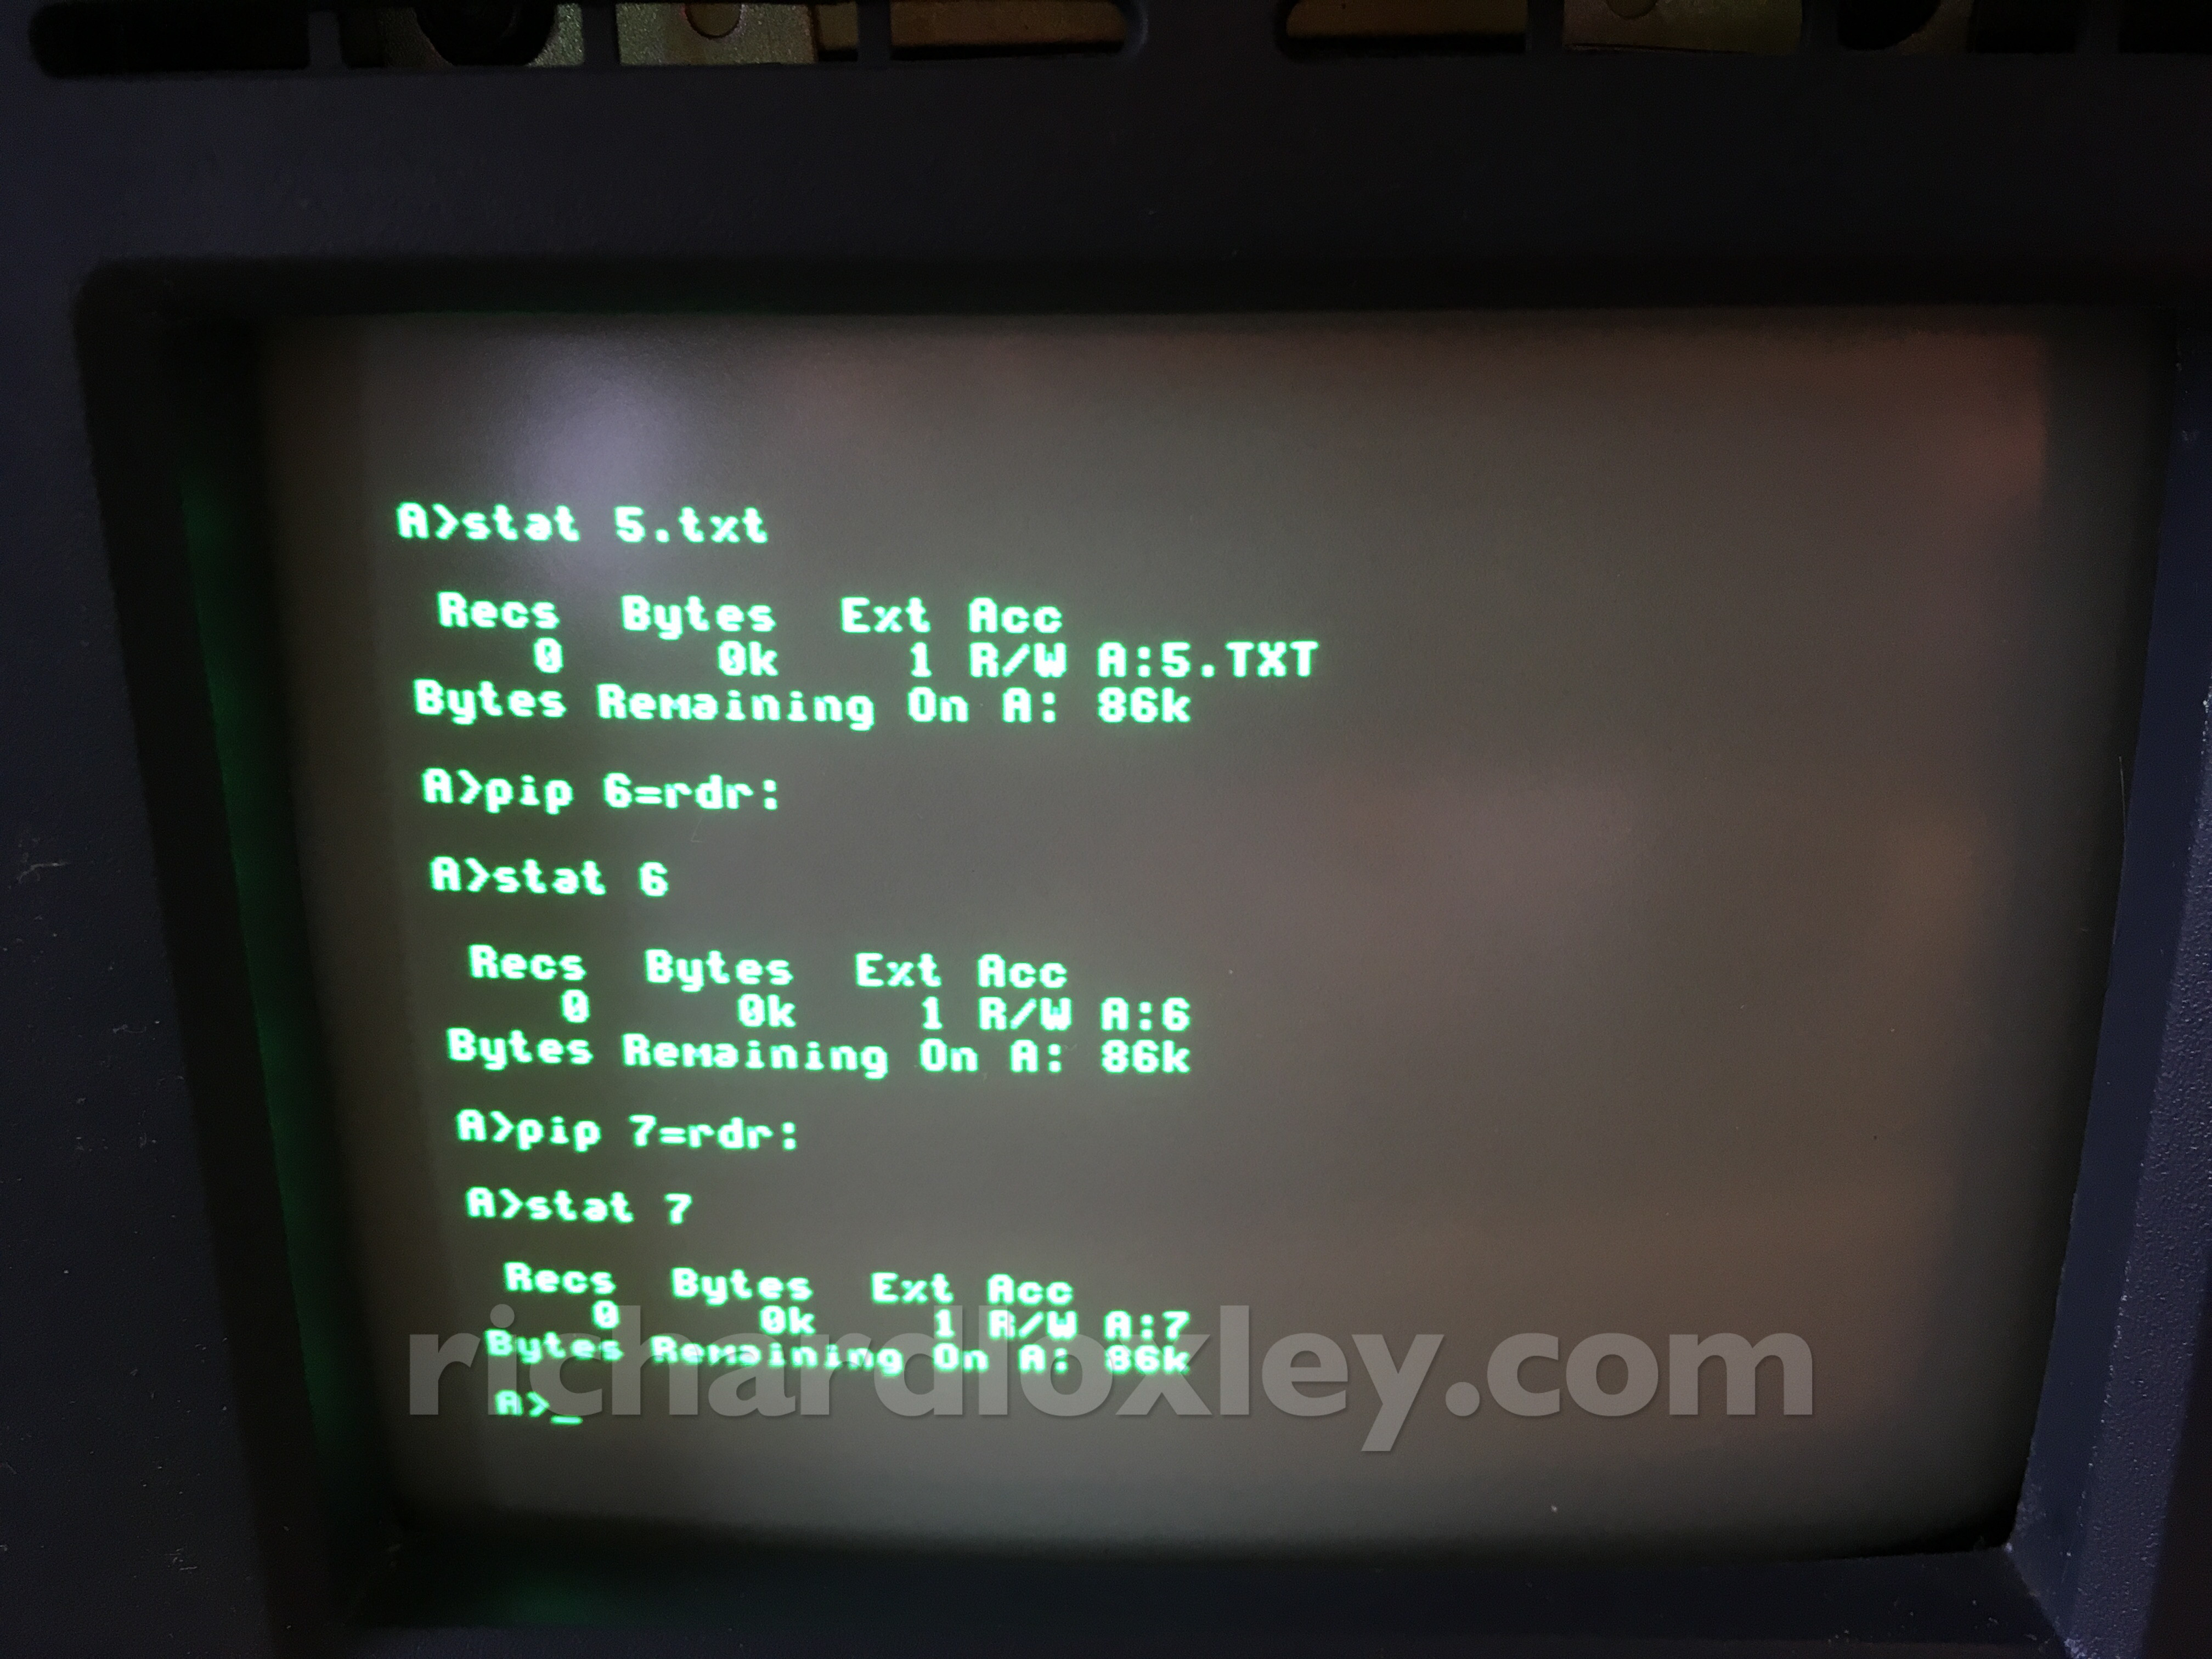
I tried at 300 and 1200 baud, I tried all the different settings in HyperTerminal (at the Windows end), and in desperation I even reversed pins 2 and 3 in my lead in case I’d got the wrong kind. Nothing.
I did notice something strange. I could quit PIP at the Osborne end by typing Control-Z on the Osborne keyboard. But surely PIP should be listening to the serial port for Control-Z, not the keyboard?
Perhaps PIP was connecting to the keyboard not the serial port?
I noticed this post says they couldn’t get RDR: to access the serial port unless they first ran the Osborne serial port diagnostics.
Hmmm, is the diagnostic program ‘wiring up’ the devices differently?
I did a bit of Googling about CPM devices, and found this manual page.
It seems that RDR: is a virtual device, that can be assigned to a number of different physical devices. STAT VAL: will tell me what devices it can connect to, and STAT DEV: will tell me the current assignments. It seems RDR: was set to TTY: (i.e. the keyboard).
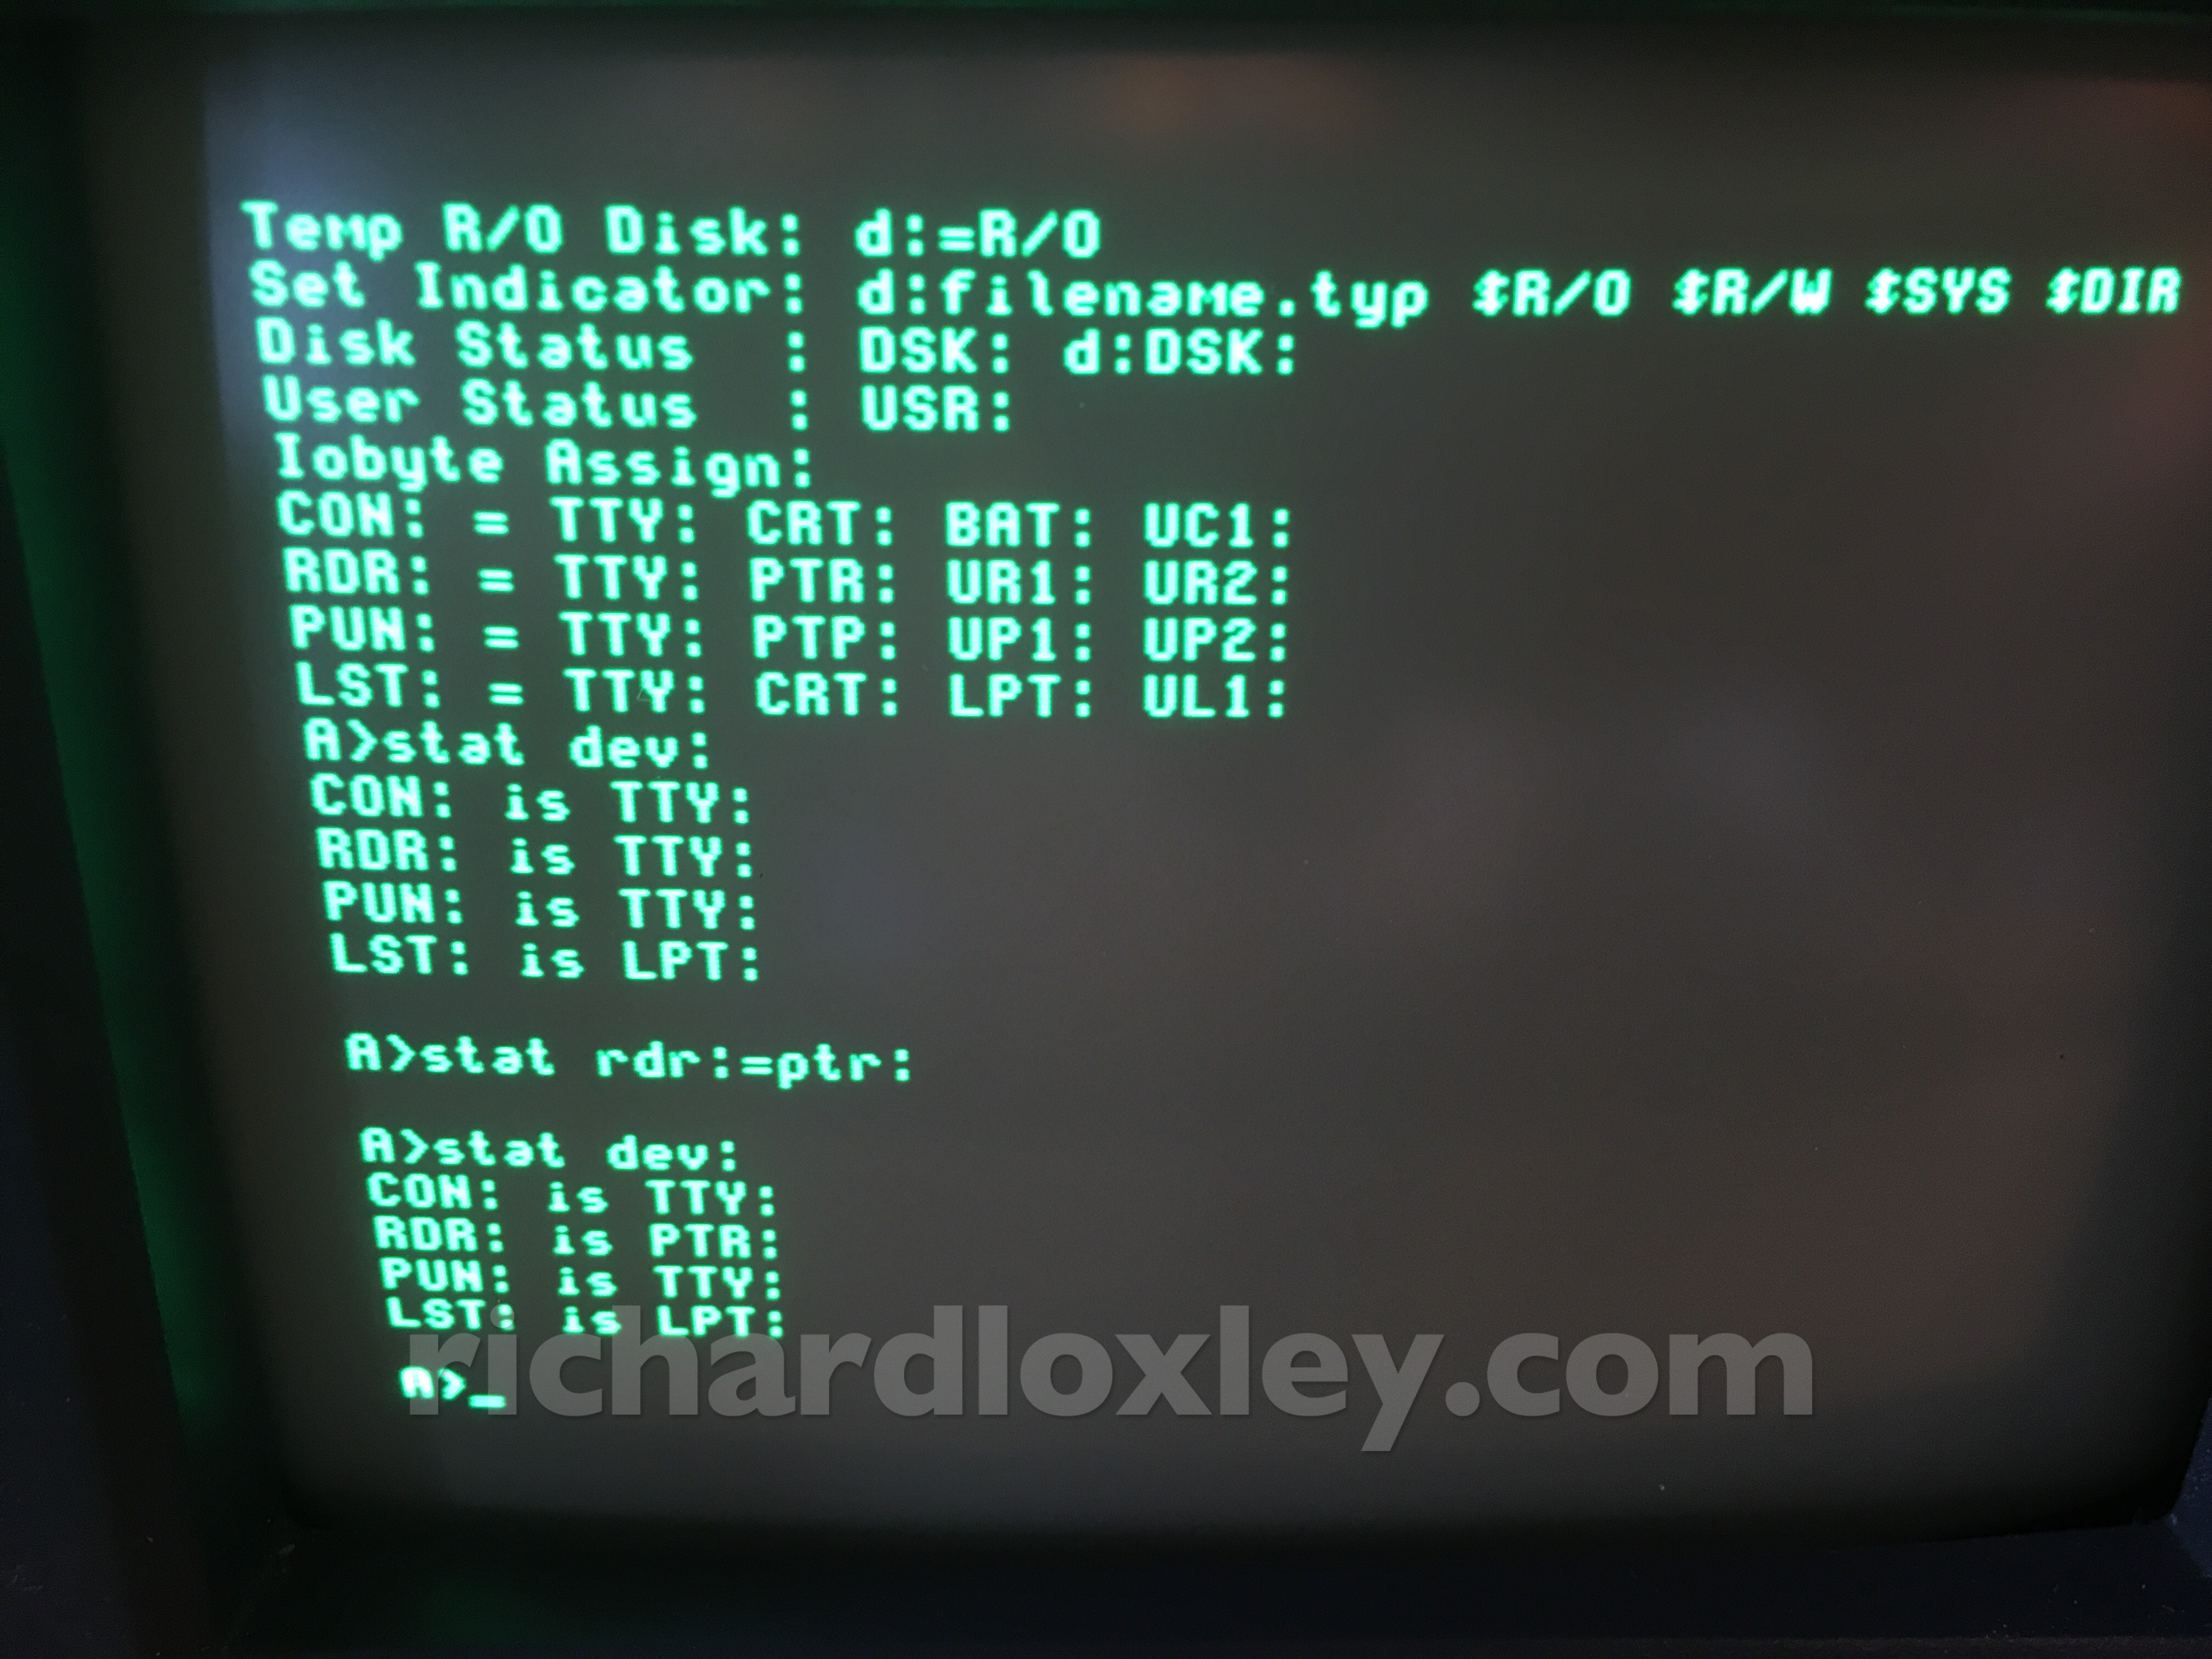
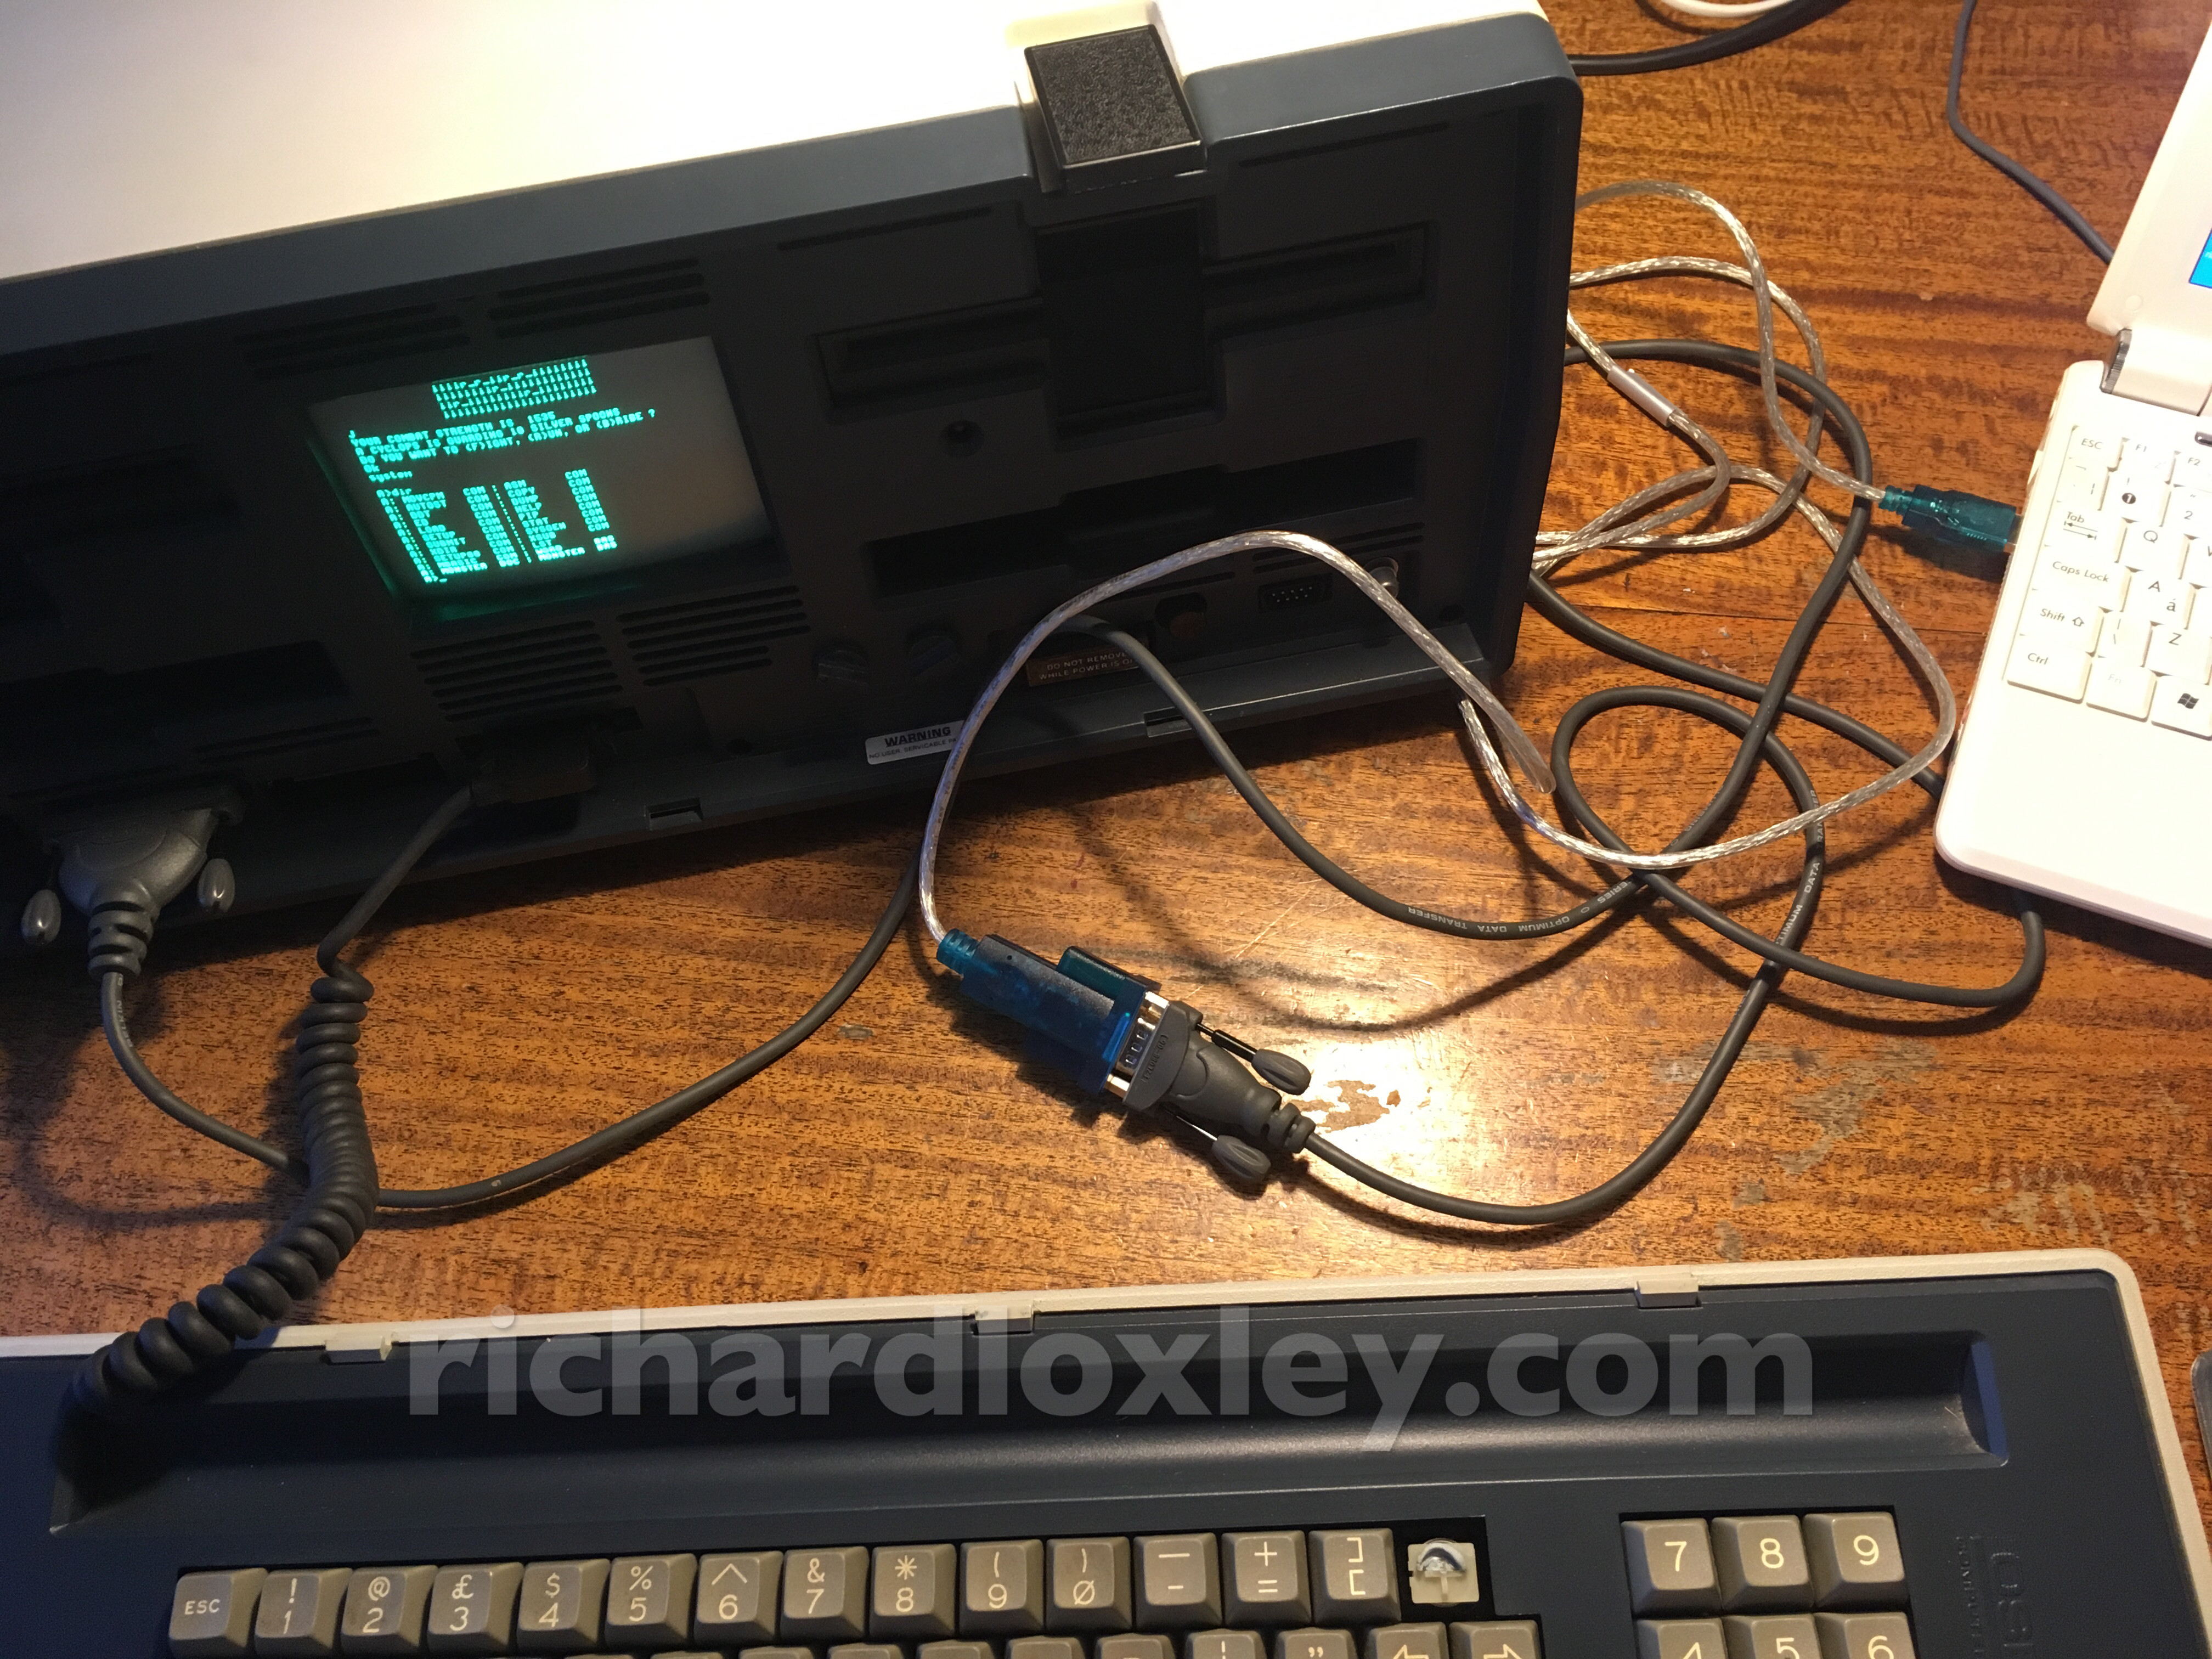
I hazarded a guess that the PTR: (Paper Tape Reader) device might be the serial port, so I tried PIP <filename>=PTR:
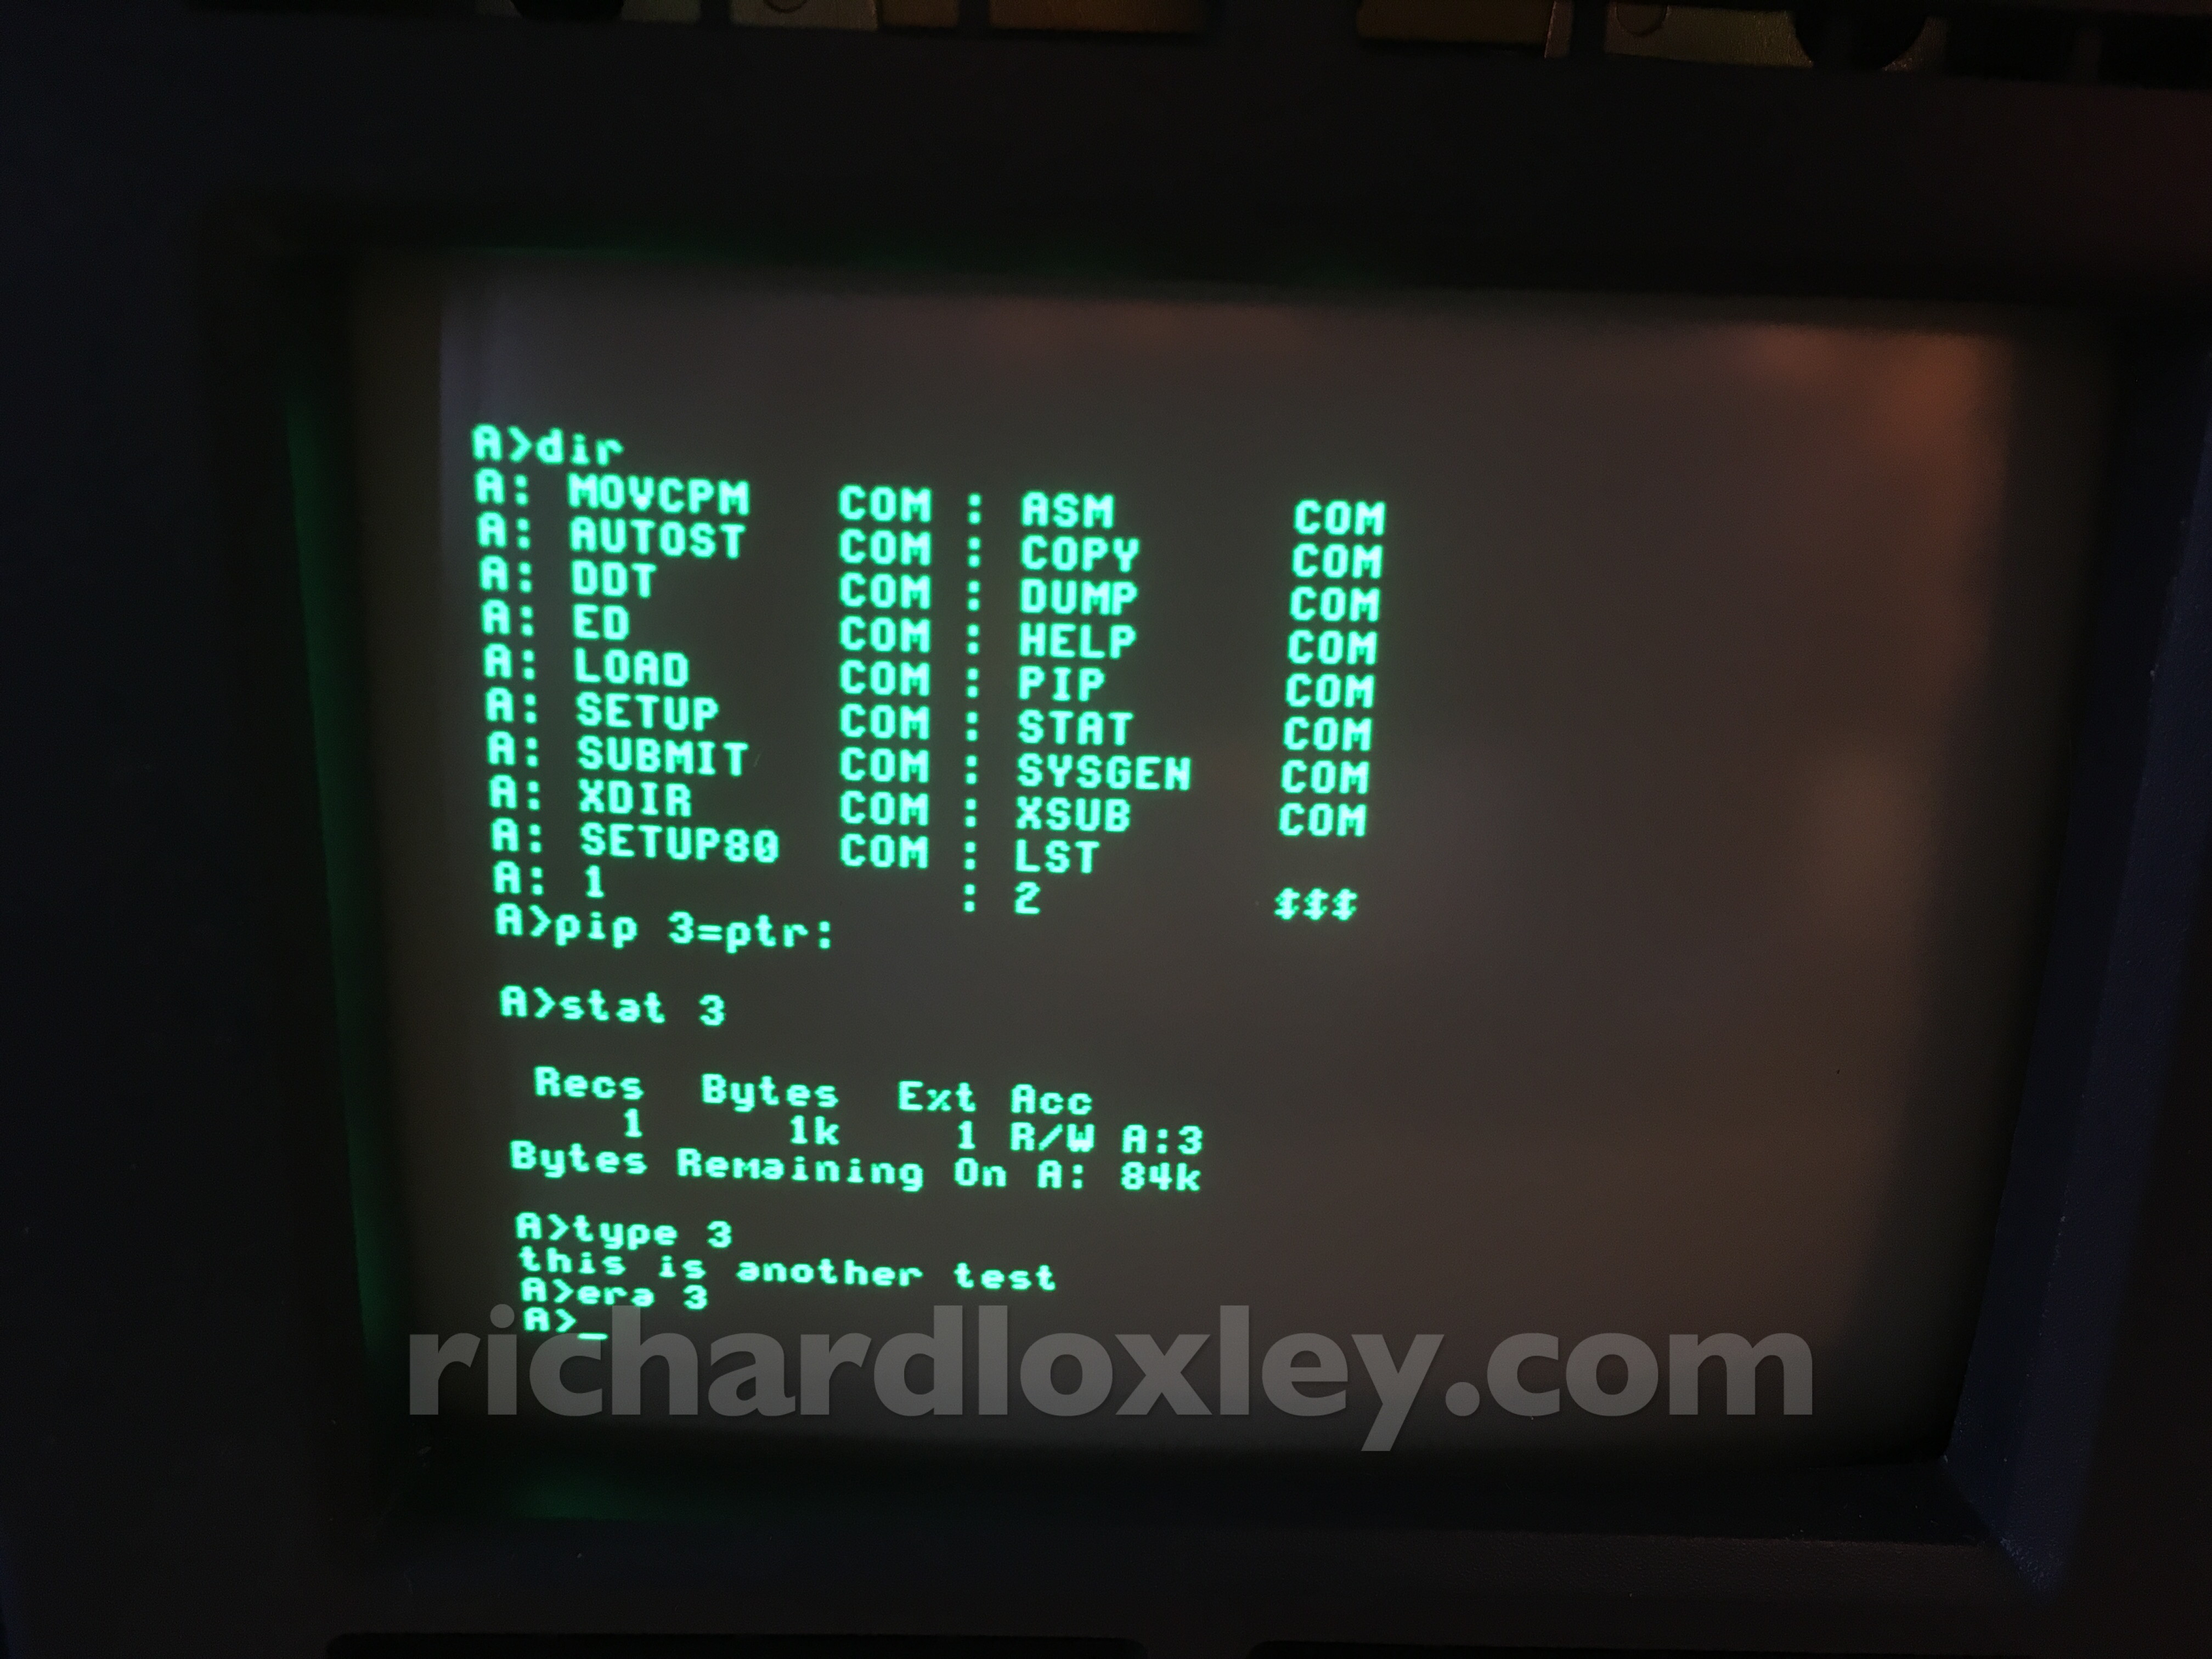
Success!
My guess is that the Osborne serial port diagnostic assigned RDR: to PTR: and left it that way, hence that being a necessary step to getting RDR: to work. But using PTR: directly allows us to bypass that step.
I then played around with settings in HyperTerminal to allow me to transfer ASCII files, and managed to get a BASIC program copied over.
(I stuck to small BASIC programs as the guides suggest PIP will miss characters from the serial port when its buffer becomes full and it has to write the buffer to disk. I’ll get a better file transfer program installed later.)
So finally here’s a video where I show the whole process end-to-end, which may be useful for anyone else trying to get it working :-)